To export slices in Photoshop, select the slice tool, right-click, and choose “Export As” for options. Exporting slices in Photoshop allows you to save specific areas of your design as separate image files, making it easier to work with elements individually.
This feature is especially useful for web design projects where you may need to optimize images for faster loading times. By exporting slices, you can streamline your workflow and ensure each element is saved in the correct format and size.
Understanding how to use this function can greatly improve your efficiency and organization when working on design projects using Photoshop.
Credit: www.giovannicreative.com
How To Create And Export Slices In Photoshop
In this blog post, we will explore the process of creating and exporting slices in Adobe Photoshop. Slices are a powerful feature that allows you to divide an image into different segments for efficient web optimization and design. Whether you’re a web designer or a digital marketer, mastering the art of creating and exporting slices can greatly enhance your workflow and lead to more visually appealing and optimized web assets. Let’s delve into the essential steps for creating and exporting slices in Photoshop.
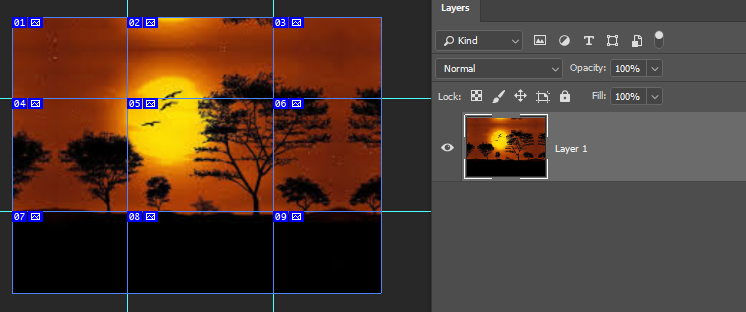
Creating Slices
To create slices in Photoshop, follow these simple steps:
- Open your Photoshop file and select the slice tool from the toolbar.
- Click and drag to create a slice around the desired portion of the image.
- Adjust the slice boundaries as needed to accurately capture the content you want to segment.
- Repeat the process to create additional slices as required.
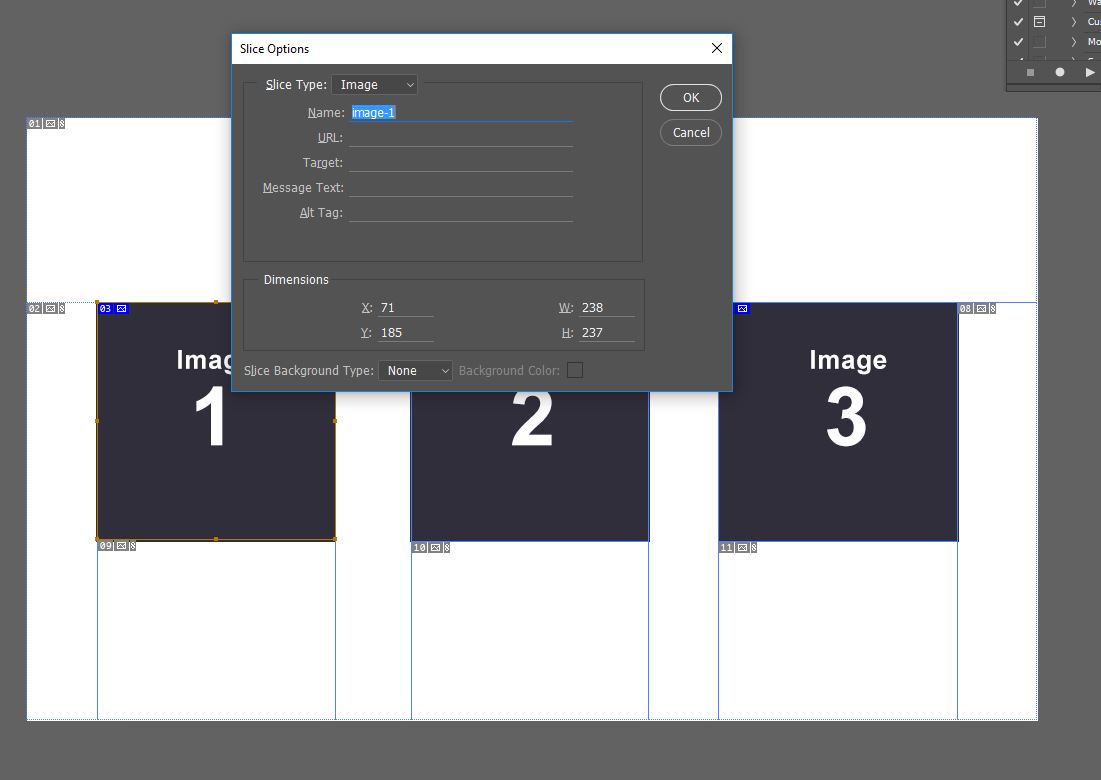
Configuring Slices
After creating slices, it’s important to configure specific attributes. To configure slices, consider the following:
- Double-click on a slice to access the slice options dialog box.
- Here, you can assign a name to the slice, specify the URL if it’s a web asset, and customize other properties such as background color or file format.
- Ensure all slices are appropriately configured to suit their intended purpose.
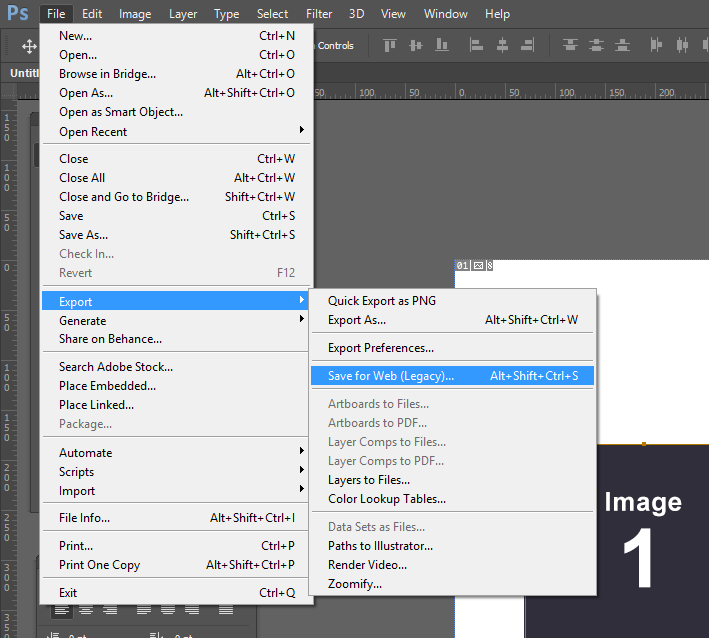
Exporting Slices
Once your slices are created and configured, it’s time to export them for use in your web projects. Follow these steps to export slices:
- Navigate to the “File” menu and select “Export” and then “Save for Web (Legacy).”
- In the export dialog box, select the slices you want to export by specifying the file format, quality, and other settings based on your requirements.
- Preview the slices to ensure they meet your expectations, and then click “Save” to export them to your desired location.
Credit: www.giovannicreative.com
Best Practices For Using Photoshop Export Slices
When working with Photoshop Export Slices, following best practices is crucial for seamless design exporting.
Naming Conventions
- Use descriptive names for each slice to identify them easily.
- Include relevant keywords in slice names for SEO optimization.
Optimizing Slice Sizes
- Ensure slice dimensions are optimized for loading speed on websites.
- Keep slice sizes as small as possible without compromising image quality.
Organizing Slices
- Create folder structures to organize slices for efficient workflow.
- Group related slices together for easy access during exporting.
Credit: community.adobe.com
Frequently Asked Questions Of Photoshop Export Slices
How Do I Export Only Selected Pieces In Photoshop?
To export selected pieces in Photoshop, use the “Export As” feature. Select the specific layers or areas you want to export, then go to File > Export > Export As. Choose your desired file format and settings, then click Export.
How Do I Export Slices To Png?
To export slices to PNG, select the “Export” option and choose “PNG” as the file format. Then, specify the destination folder and hit “Export” to generate PNG files of your slices.
Can You Copy Slices In Photoshop?
Yes, you can copy slices in Photoshop. Simply select the slice you want to copy and use the copy command or the keyboard shortcut (Ctrl+C on Windows or Command+C on Mac). Then, paste the copied slice in the desired location using the paste command or the keyboard shortcut (Ctrl+V on Windows or Command+V on Mac).
How Do You Export A Grid In Photoshop?
To export a grid in Photoshop, go to File > Export > Export As. In the dialog box, choose the desired image format and adjust the settings as needed. Click Export to save the grid as a separate file.
Conclusion
Mastering the Photoshop Export Slices feature can elevate your design workflow and deliver optimal results. By efficiently slicing and exporting images, you can streamline your web design process and ensure seamless integration with various platforms and devices. Embrace this valuable tool to enhance your productivity and achieve visually stunning designs.
Start slicing today for a more efficient design process.