To RGB split in Photoshop, duplicate the image layer three times, then separate each layer using the Channel Mixer. Creating a unique and dynamic visual effect, RGB splitting in Photoshop is a technique that can add depth and interest to your photos.
By dividing the red, green, and blue channels of an image and slightly displacing them, you can achieve a glitchy, distorted look that is popular in digital art and graphic design. Whether you’re aiming for a futuristic aesthetic or a retro-inspired vibe, RGB splitting allows you to experiment with color and composition in a creative way.
We will guide you through the process of RGB splitting in Photoshop, providing step-by-step instructions to help you master this captivating technique.
Credit: m.youtube.com
Understanding Rgb Split
RGB split is a popular visual effect used to create a glitchy, distorted look in images and videos. Understanding how to RGB split in Photoshop can add an edgy, dynamic appeal to your visual content. In this post, we’ll explore the basics of RGB split and how you can use this technique to enhance your design projects.
H3: What is RGB Split?What Is Rgb Split?
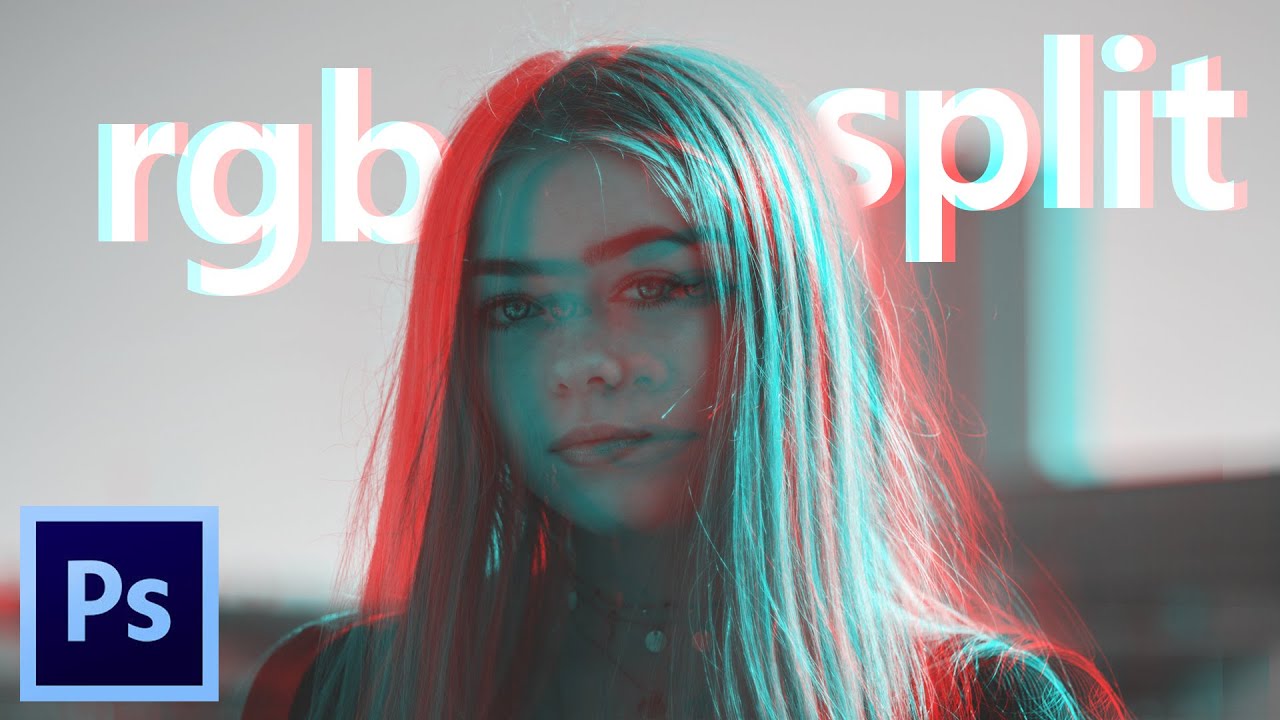
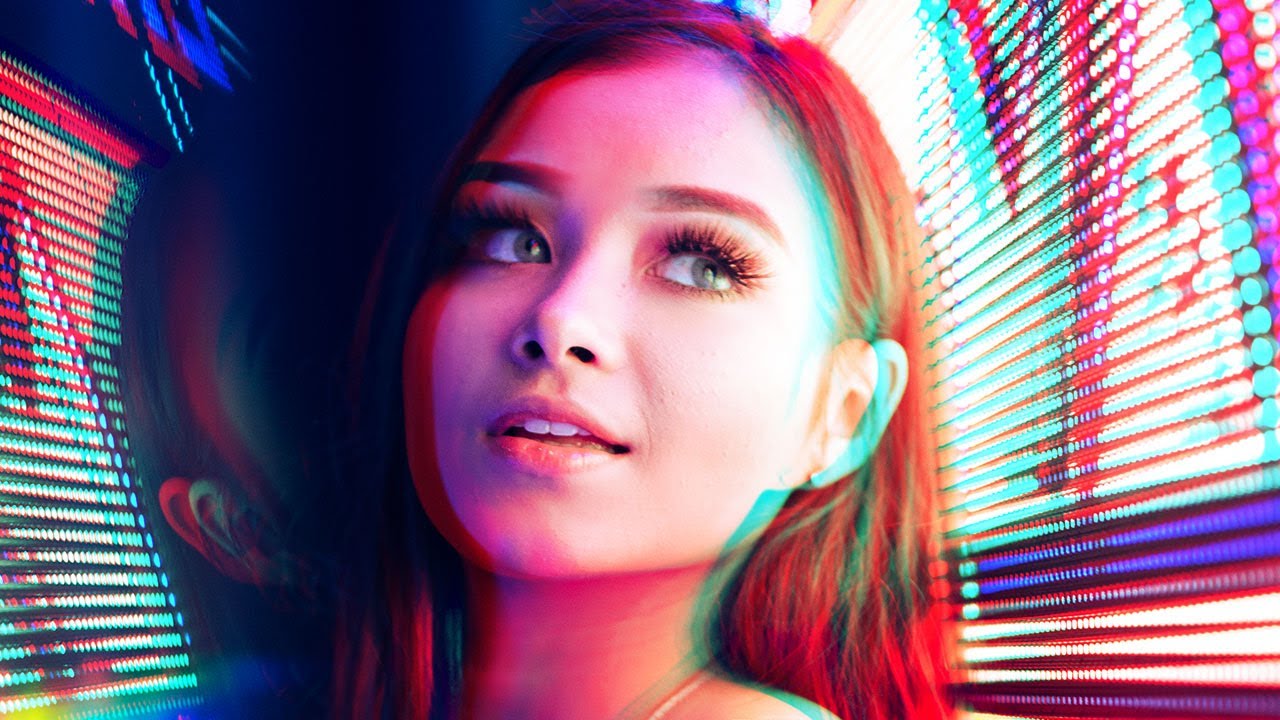
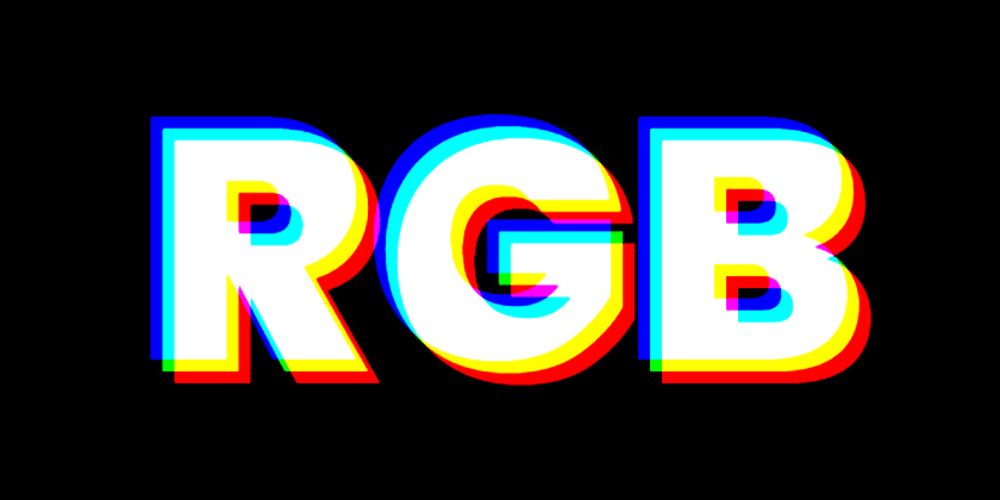
RGB split is a digital effect that separates the red, green, and blue color channels of an image, causing a displacement and misalignment of the channels. This creates a surreal, glitch-like appearance, often associated with a retro or futuristic aesthetic. In Photoshop, achieving an RGB split effect involves duplicating the image, shifting the color channels, and then blending the layers to produce the desired visual impact.
H3: Why is RGB Split used?Why Is Rgb Split Used?
RGB split is used to add a sense of dynamic energy and visual distortion to images or videos. It can be employed to convey a sense of chaos, disorientation, or futuristic style, making it a popular choice for various design and multimedia projects. Additionally, RGB split can enhance visual storytelling by evoking a sense of digital and analog fusion, appealing to modern and retro audiences alike.
Credit: makerlex.com
Creating Rgb Split In Photoshop
Crafting a fascinating RGB split effect in Photoshop can add a dynamic and edgy touch to your images. This captivating technique involves separating the red, green, and blue channels of an image to create a trippy and glitchy visual effect. Let’s delve into the step-by-step process of creating RGB split in Photoshop.
Step 1: Open The Image In Photoshop
Open Photoshop and import the image you want to work on.
Step 2: Duplicate The Image
Duplicate the image layer to avoid any permanent changes to the original.
Step 3: Separate The Rgb Channels
Go to ‘Image’ menu, select ‘Mode’ and then choose ‘RGB Color’ to separate the channels.
Step 4: Apply The Rgb Split Effect
Shift each channel by selecting the ‘Move’ tool and carefully moving the channels slightly apart.
Step 5: Adjust The Offset And Blur
Experiment with the offset and blur effects to achieve the desired level of distortion.
Step 6: Merge The Channels
Merge the RGB channels back together by selecting ‘RGB Color’ under the ‘Image’ menu.
Step 7: Refine The Effect
Refine the RGB split effect by adjusting the opacity, blend modes, and colors to enhance the visual impact.
Tips And Tricks For Rgb Split
To master the art of RGB split in Photoshop, it’s essential to familiarize yourself with some key tips and tricks. By incorporating these techniques into your workflow, you can create stunning visual effects that will captivate your audience.
Experiment With Different Offset Values
Adjusting offset values allows you to manipulate the RGB channels independently and achieve varying degrees of split effects. Try different values for each channel to explore the creative possibilities.
Utilize Layer Masks For Precise Control
Layer masks are invaluable tools for achieving precise control over your RGB split effects. By selectively masking certain areas of the image, you can fine-tune the appearance of the split for a polished result.
Combine Rgb Split With Other Effects
For a truly unique outcome, consider combining RGB split with other effects in Photoshop. Experiment with blending modes, filters, and adjustment layers to enhance the overall visual impact of your composition.

Credit: makerlex.com
Frequently Asked Questions On How To Rgb Split In Photoshop
How Do You Split Colors In Photoshop?
To split colors in Photoshop, select the image layer and go to Image > Adjustments > Channel Mixer. Then, check the “Monochrome” box and use the sliders to adjust the individual color channels. You can also use the Select > Color Range tool to isolate specific colors for further manipulation.
How Do You Separate Rgb?
To separate RGB, identify the three primary colors of red, green, and blue. Adjust the intensity levels of each color to create different shades and hues. Mix the colors in varying proportions to achieve the desired color palette.
How Do You Make Rgb Glitch In Photoshop?
To create an RGB glitch in Photoshop, go to the “Image” menu, then select “Adjustments” and “Channel Mixer. ” Check the “Monochrome” box and adjust the sliders to create the desired glitch effect.
What Is The Split Color Effect In Rgb?
The split color effect in RGB is when an image’s colors are divided into separate red, green, and blue channels, creating a distinct and impactful visual effect. This effect is commonly used in graphic design and photography to enhance the overall aesthetics of an image.
Conclusion
Mastering the RGB split effect in Photoshop can elevate your design game. Whether it’s for creating dynamic visuals or adding a unique touch to your images, this technique offers endless possibilities. With some practice and experimentation, you’ll be able to incorporate this eye-catching effect into your projects with ease.
Start exploring and watch your creativity soar!