To manually move the ink cartridge in an HP printer, gently open the printer cover first. Then, slide the cartridge to the desired position carefully.
When it comes to troubleshooting your HP printer, knowing how to move the ink cartridge manually can be a useful skill. Whether you need to replace a cartridge or simply want to inspect it, being able to perform this task can save you time and frustration.
By following a few simple steps, you can move the ink cartridge in your HP printer with ease. We will provide you with a detailed guide on how to manually move an ink cartridge in an HP printer, ensuring smooth printing operations and maintenance of your device.
Credit: h30434.www3.hp.com
Preparation
Before manually moving an ink cartridge in an HP printer, it’s important to prepare the printer for the task at hand. Proper preparation minimizes the risk of damage to the printer and the cartridges. Here are the essential steps to follow when preparing to manually move an ink cartridge in an HP printer:
Turn Off The Printer
To avoid any accidents or mishaps, the first step is to ensure that the printer is turned off. This will prevent any moving parts from causing injury, as well as minimizing the risk of damaging the ink cartridges or the printer itself.
Locate The Ink Cartridge
Next, you need to locate the ink cartridge within the printer. This involves opening the printer as per the manufacturer’s instructions and accessing the area where the cartridges are housed. Ensure that you have a clear view and access to the cartridges before proceeding further.
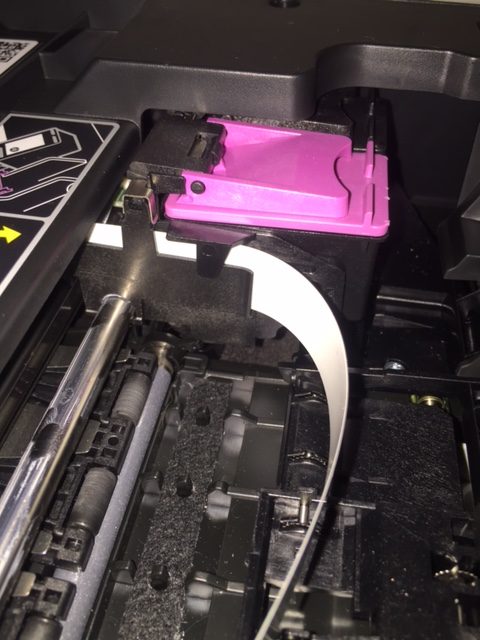
Removing The Ink Cartridge
To manually move an ink cartridge in an HP printer, one essential step is Removing the Ink Cartridge. Here’s how you can accomplish this task effectively:
Open The Printer Cover
Following the printer’s user manual, gently open the cover to access the ink cartridges. Make sure to handle the printer with care.
Gently Remove The Ink Cartridge
Ensure the printer is turned off before proceeding. Delicately grasp the ink cartridge and pull it out slowly but firmly from its slot.
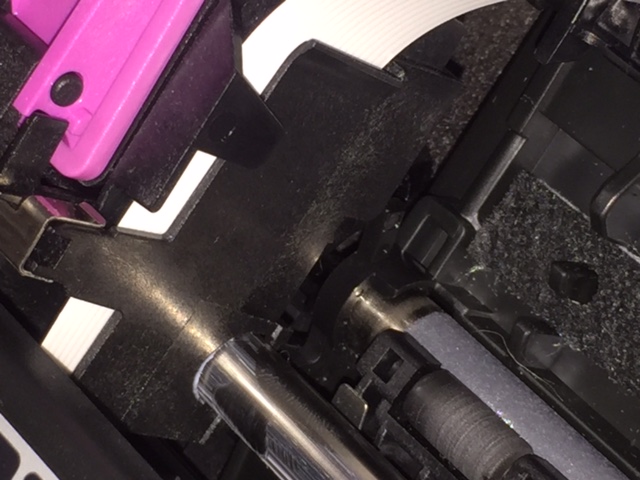
Manually Moving The Ink Cartridge
Manually Moving the Ink Cartridge: Follow these simple steps to manually move the ink cartridge in your HP printer.
Turn On The Printer:
Press the power button to turn on the printer and wait for it to initialize.
Wait For The Cartridge Carriage To Move:
Observe as the cartridge carriage starts to move into position.
Gently Push The Cartridge Carriage To The Center:
Using gentle pressure, push the cartridge carriage to the center of the printer.
Credit: printertesting.com
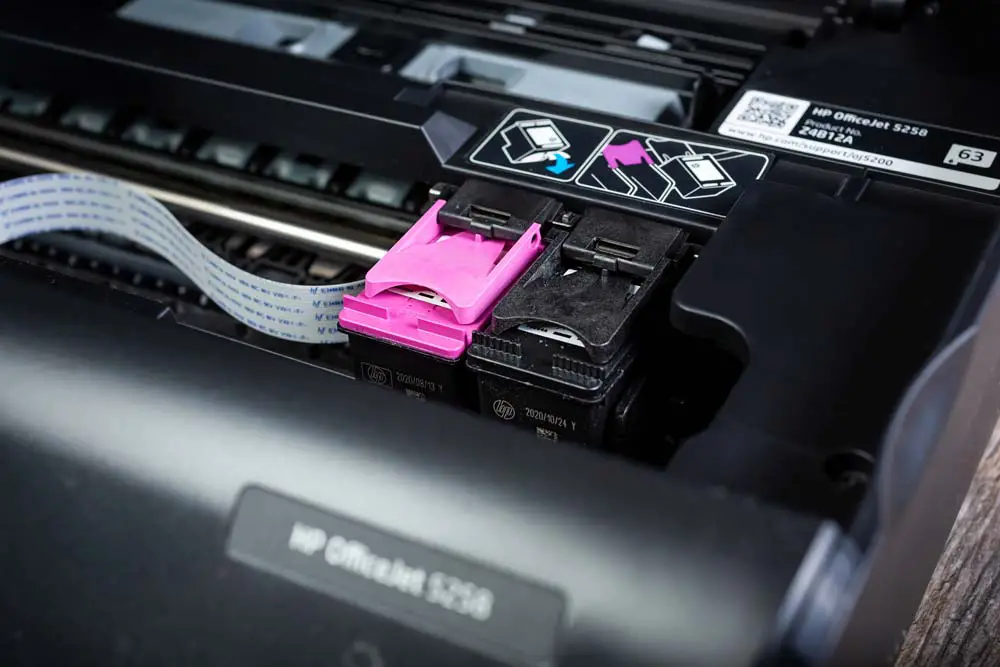
Replacing The Ink Cartridge
Before you start replacing the ink cartridge in your HP printer, it’s important to know the correct manual process to ensure the printer functions smoothly. In this guide, we’ll walk you through the steps to manually move the ink cartridge and replace it with a new one.
Insert The New Ink Cartridge
Once you have removed the old ink cartridge, carefully insert the new one into the designated slot. Ensure that it is securely seated and properly aligned with the cartridge holder.
Close The Printer Cover
After inserting the new ink cartridge, gently close the printer cover. Make sure that it is securely latched to prevent any dust or debris from entering the printer.
Testing The Printer
Once you have manually moved the ink cartridge in your HP printer, it’s time to test the printer and ensure everything is working smoothly. This step is crucial to verify that your printer is functioning correctly and to check the print quality. In this section, we will guide you through the process of printing a test page and checking the print quality to ensure optimal results.
Print A Test Page
Printing a test page allows you to assess the performance of your HP printer and ensure that it is set up properly. To print a test page, follow these simple steps:
- Make sure your printer is powered on and connected to your computer or network.
- Open the printer software or control panel on your computer.
- Locate the “Print” option, usually represented by a printer icon, and click on it.
- Select the “Test Page” option from the drop-down menu.
- Click on the “Print” button to start the printing process.
Once you have initiated the print command, the printer will generate a test page. It usually includes various elements such as text, graphics, and color patterns. Ensure that the test page is printed correctly with no smudges, streaks, or color inconsistencies.
Check Print Quality
Checking the print quality is crucial to identify any issues that may affect the final output of your documents or images. Here’s how you can assess the print quality:
- Examine the printed text for clarity and sharpness. Ensure that the characters are crisp and easy to read.
- Inspect the printed images or graphics for color accuracy, sharpness, and level of detail.
- Look for any ink smudges, spots, or streaks on the printed paper.
- Check if the colors appear vibrant and true to the original.
- Compare the printed page to the on-screen preview or the original document to ensure accuracy.
If you notice any issues with the print quality, it’s essential to take the necessary steps to address them. This may include cleaning the printer heads, replacing ink cartridges, or adjusting the printer settings.
By following these steps and testing your HP printer, you can ensure that it is functioning correctly and producing high-quality prints. Regularly testing the printer will help you identify any potential problems early on and maintain optimal performance.
Credit: issuu.com
Frequently Asked Questions On How To Manually Move Ink Cartridge In Hp Printer
How Do You Manually Move An Ink Cartridge?
To manually move an ink cartridge, locate the printer’s carriage, gently grasp the cartridge, and carefully slide it in the desired direction. Make sure to handle it with care to avoid damaging the printer or cartridge.
How Do I Fix A Stuck Ink Cartridge In My Hp Printer?
To fix a stuck ink cartridge in your HP printer, carefully open the printer cover. Gently push the cartridge to release it, then lift it out. Check for any obstructions or dried ink, and carefully clean the cartridge and area.
Reinstall the cartridge and close the cover.
What To Do If Ink Cartridge Is Not Moving?
If the ink cartridge is not moving, ensure it’s properly installed. Check for any obstructions and clean the printer. Restart the printer for a potential reset. Contact customer support if the issue persists.
How Do I Free The Cartridge Cradle On My Hp Printer?
To free the cartridge cradle on your HP printer, power it off, wait for it to stop moving, and gently push the cradle to the side.
Conclusion
Learning how to manually move ink cartridges in an HP printer can save you time and frustration. By following the simple steps outlined in this guide, you can keep your printer running smoothly and produce high-quality prints. With this valuable knowledge, you can troubleshoot printer issues with ease and maintain optimal printing performance.