To fix cells in Excel, select the cell or range, then click on ‘Format Cells’. Choose the desired formatting option.
Excel gives you the power to customize the appearance of your data by fixing cells. By learning how to fix cells in Excel, you can control how information is displayed and organized. Whether it’s changing the font, adjusting alignment, or applying borders, knowing how to fix cells allows you to present your data in a clear and professional manner.
This guide will provide you with step-by-step instructions to solve any cell formatting issues you encounter in Excel, helping you create visually appealing and well-organized spreadsheets. Mastering the art of fixing cells in Excel is essential for efficient data management and presentation.
Common Issues With Cells In Excel
Blank Cells
Blank cells are a common issue in Excel that can affect data analysis and presentation. Without proper handling, blank cells can distort calculations and lead to inaccurate results. It’s crucial to identify and address blank cells in Excel to ensure data integrity and accuracy. Consider using filters, conditional formatting, or formulas to manage and fill in blank cells for a more organized and reliable dataset.
Mismatched Data Types
Mismatched data types often cause confusion and errors in Excel, disrupting the intended functionality of spreadsheets. Ensuring consistent data types throughout the worksheet is essential to prevent unexpected issues. By using the ‘Text to Columns’ feature or applying data validation, you can correct mismatched data types and maintain uniformity across the dataset.
Formula Errors
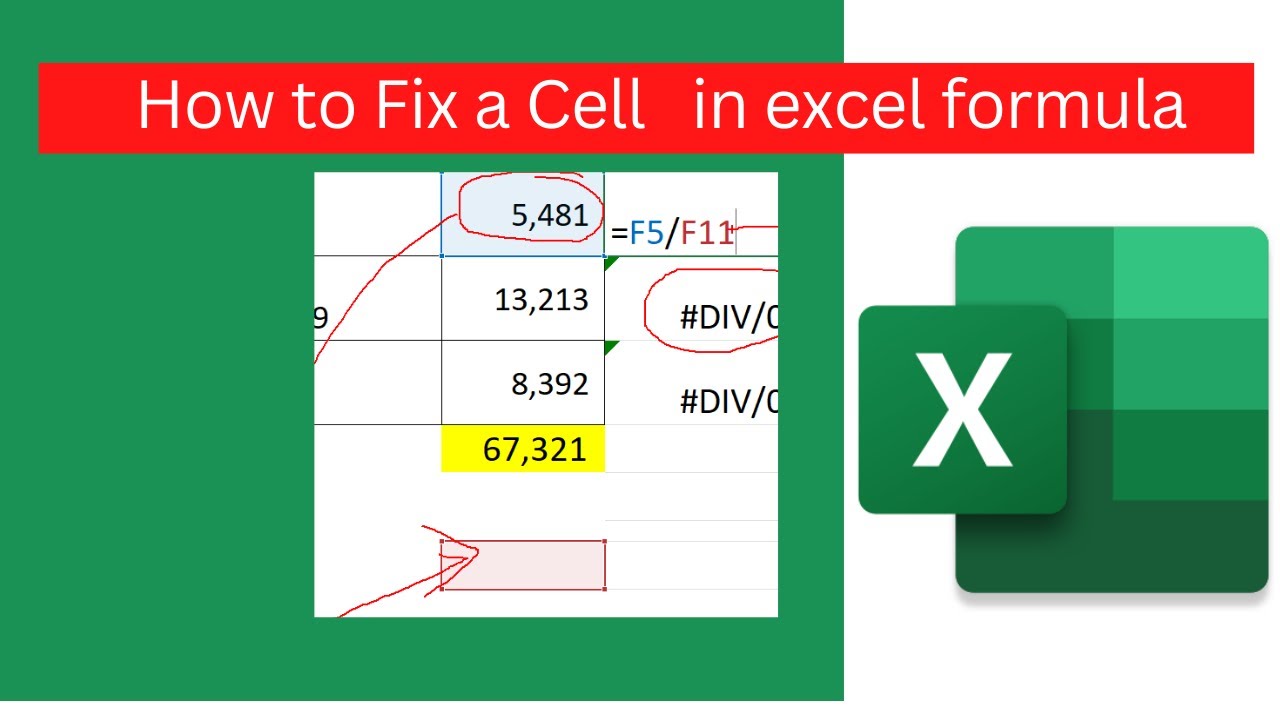
Formula errors, such as #DIV/0! or #REF!, can impede the accuracy and relevance of Excel calculations. To overcome this, carefully review and debug formulas to identify potential errors. Utilizing Excel’s built-in error checking tools and functions like IFERROR can help in detecting and handling formula errors effectively.
Credit: www.ablebits.com
Fixing Blank Cells
When it comes to Fixing Blank Cells in Excel, one common issue is dealing with empty cells. Let’s explore two effective methods: Deleting Blank Cells and Filling Blank Cells with Values.
Deleting Blank Cells
Deleting Blank Cells is a quick way to clean up your Excel data. Follow these steps:
- Select the range of cells that contain blank cells.
- Click on the “Home” tab on the Excel ribbon.
- Click on “Clear” in the “Editing” group.
- Select “Clear Contents” to remove the content from the blank cells.
Filling Blank Cells With Values
Filling Blank Cells with Values can help maintain data integrity. Here’s how you can do it:
- Select the range of cells that contain blank cells.
- Press “Ctrl” + “G” to open the “Go To” dialog box.
- Click on “Special” and choose “Blanks”.
- Enter the value you want to fill the blank cells with.
- Press “Ctrl” + “Enter” to fill all the selected blank cells with the entered value.
Fixing Mismatched Data Types
Converting Data Types
If you encounter mismatched data types in your Excel sheet, converting data types can help resolve this issue.
Using Text To Columns
Another method to address mismatched data types is by using the Text to Columns feature in Excel.
You can split data into separate columns by specified delimiters, such as commas or spaces to ensure consistency.
Credit: support.microsoft.com
Fixing Formula Errors
Fixing formula errors in Excel is essential to ensure accurate data analysis and reporting. Errors in formulas can lead to incorrect calculations, causing miscalculations and misinterpretation of data.
Identifying Formula Errors
To begin fixing formula errors, the first step is to identify where the errors are occurring. Excel provides various error types that indicate the nature of the issue. Common error types include #DIV/0! for division by zero, #REF! for referencing errors, #VALUE! for incorrect data types, and more.
Correcting Formula Errors
Once the formula errors are identified, the next step is to correct them. This involves reviewing the formula syntax, ensuring correct cell references, and addressing any logical or mathematical errors. Checking for missing or misplaced parentheses, as well as verifying the order of operations, can help in rectifying errors.
Best Practices For Cell Management
When it comes to managing cells in Excel, it’s important to follow best practices to ensure your spreadsheet is organized and easy to work with. In this section, we will discuss three important techniques for cell management: avoiding merge cells, using named ranges, and protecting cells.
Avoiding Merge Cells
Merge cells may seem like a convenient way to combine data, but they can cause a lot of trouble in the long run. Avoid merging cells whenever possible as it can result in data misalignment and make it difficult to manipulate individual cells. Instead, use alternative formatting techniques such as centering or applying a border to emphasize a group of cells.
Using Named Ranges
Named ranges are a powerful feature in Excel that allows you to assign a name to a range of cells. This not only makes formulas easier to read and understand but also provides flexibility when you need to update or refer to specific data. To create a named range, simply select the range of cells, click on the “Formulas” tab in the Excel ribbon, and choose “Define Name” option. Give your named range a descriptive name and you’re good to go!
Protecting Cells
Protecting cells is crucial when you want to limit editing access to specific parts of your spreadsheet. By protecting cells, you can prevent accidental changes to important data, formulas, or formatting. To protect cells, highlight the cells you want to protect, right-click, and select “Format Cells.” In the “Protection” tab, check the “Locked” box, and then protect the worksheet by going to the “Review” tab and clicking on “Protect Sheet”.
Credit: www.techlicious.com
Frequently Asked Questions For How To Fix Cells In Excel
How Do You Fixate A Cell In Excel?
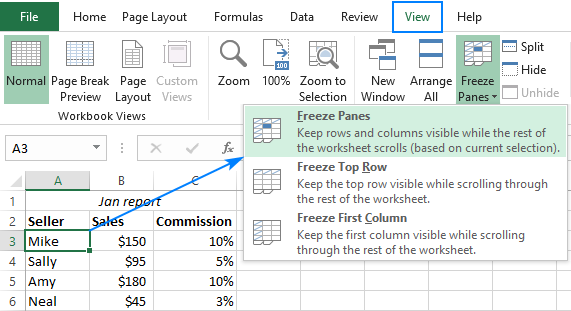
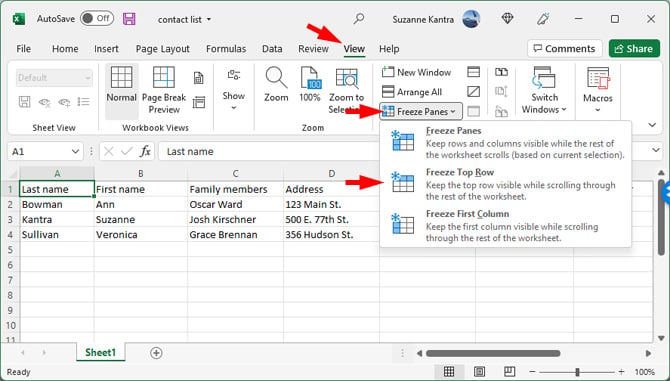
To fixate a cell in Excel, select the cell and go to the “View” tab. Click on “Freeze Panes” and choose either “Freeze Panes” or “Freeze Top Row” based on your needs. This will keep the selected row or column visible while scrolling through the rest of the spreadsheet.
How Do I Keep Cells Fixed In Excel?
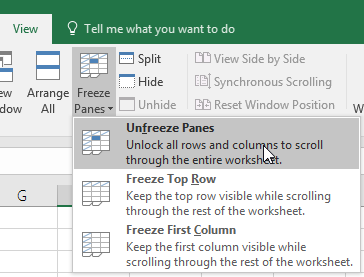
To fix cells in Excel, select the cell or range, go to the “View” tab, click on “Freeze Panes,” and choose “Freeze Panes” or “Freeze Top Row/First Column. ” This will keep the selected cells visible while scrolling.
How Do I Auto Fix Cells In Excel?
To auto fix cells in Excel, select the cells you want to correct, then go to the “Data” tab and click on “Text to Columns. ” Choose the appropriate option and Excel will automatically update the cells.
How Do I Fix Rows And Cells In Excel?
To fix rows or cells in Excel, select the row or cell you want to freeze, then click on “View” tab, and choose “Freeze Panes” option.
Conclusion
Mastering Excel’s cell-fixing capabilities is essential for efficient data management. With the knowledge gained from this blog post, you can now confidently navigate and troubleshoot common cell-related issues in Excel. By implementing these tips, you’ll streamline your workflow and increase productivity, ultimately becoming a proficient Excel user.