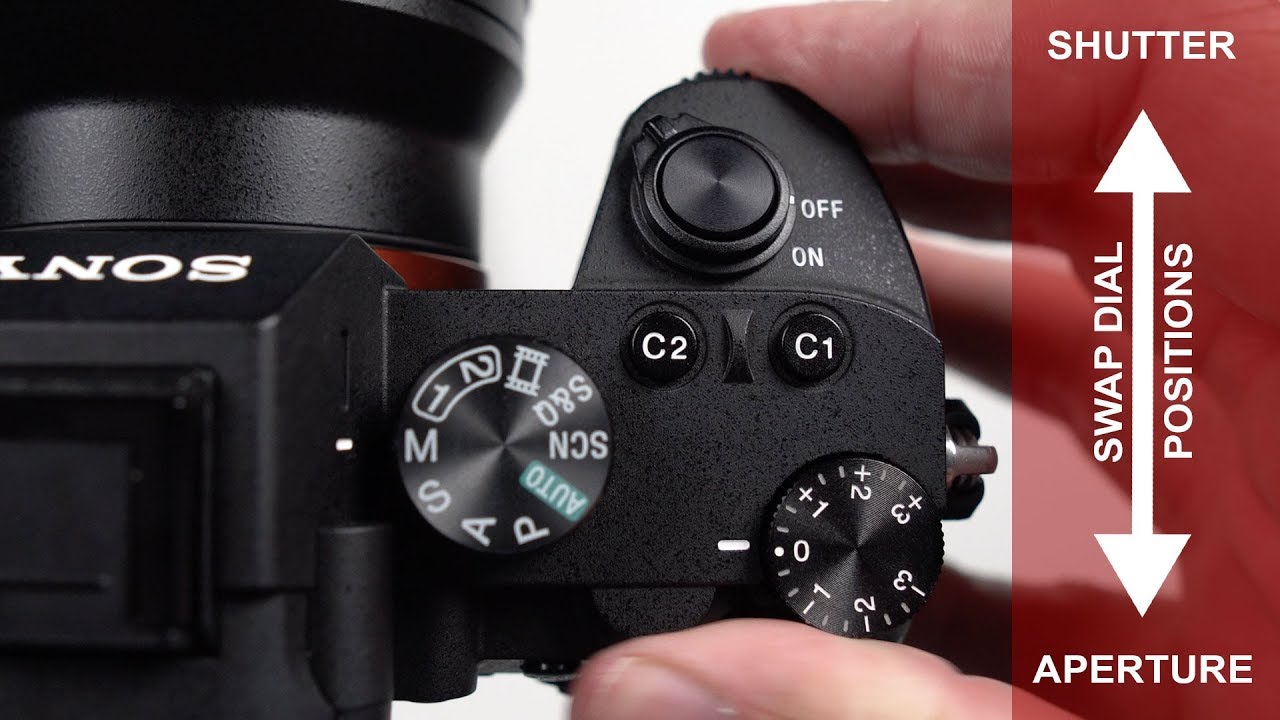
To change the F-stop on Sony A7III, simply rotate the aperture ring on the lens. This allows you to adjust the aperture settings manually.
Photographers often want to control the depth of field in their photos, requiring them to adjust the F-stop. Understanding how to change the F-stop on a Sony A7III is crucial for achieving desired photographic effects. By mastering this fundamental aspect of camera settings, you can enhance your photography skills and create stunning images with precise control over the depth of field.
In this guide, we will explore the step-by-step process of changing the F-stop on the Sony A7III, enabling you to unleash your creativity and capture breathtaking photos.
Credit: m.youtube.com
Understanding F-stop On Sony A7iii
Understanding F-stop on Sony A7III is crucial for mastering your photography skills. As a photographer, knowing how to change the F-stop on your camera can drastically improve the quality of your images. The F-stop setting on your Sony A7III controls the amount of light that enters the camera, giving you control over the depth of field and the overall exposure of your photos.
What Is F-stop?
F-stop, also known as aperture, refers to the size of the opening in the lens through which light enters the camera. It is represented by a series of numbers such as f/1.4, f/2.8, f/4, and so on. The lower the F-stop number, the larger the opening, allowing more light to enter the camera. Conversely, a higher F-stop number indicates a smaller opening, resulting in less light reaching the image sensor.
Importance Of Understanding F-stop
Understanding F-stop is essential for achieving the desired depth of field in your photos. It allows you to control the amount of background blur, also known as bokeh, in your images. Additionally, a good grasp of F-stop settings empowers you to capture sharp, well-exposed images in various lighting conditions, ultimately enhancing the overall quality of your photography.
Changing F-stop On Sony A7iii
Changing F-stop on Sony A7III allows you to control the aperture size on your camera lens, determining the amount of light entering the sensor. Mastering how to adjust the F-stop setting can significantly impact your photography by influencing depth of field and exposure.
Locating The F-stop Control
To change the F-stop on your Sony A7III, look for the aperture ring on the lens. Rotate the ring to adjust the F-stop value according to your desired setting. On some lenses, the F-stop may be adjusted electronically through the camera’s menu system.
Adjusting The F-stop Value
Turn the aperture ring clockwise to increase the F-stop number, which decreases the size of the aperture opening. Conversely, turning it counterclockwise decreases the F-stop number, allowing more light to pass through the lens.
Effects Of Changing The F-stop
Lower F-stop values (e.g., f/1.8) result in a shallow depth of field, ideal for portraits and close-ups, creating a blurred background effect. Higher F-stop values (e.g., f/16) produce a larger depth of field, suitable for landscape photography, keeping more details sharp from foreground to background.
Tips For Choosing The Right F-stop
- Consider your subject: Use low F-stop for portraits and high F-stop for landscapes.
- Experiment: Try different F-stop settings to find the best one for your desired effect.
- Understand depth of field: Lower F-stop creates blur, while higher F-stop keeps more in focus.
- Light conditions: Adjust F-stop in low light for better exposure without compromising image quality.
Common Mistakes To Avoid
Learn how to change the F stop on your Sony A7III without making common mistakes. Our SEO friendly guide provides simple steps for a seamless adjustment, ensuring your photography experience is smooth and hassle-free.
Misunderstanding F-stop Values
One common mistake when adjusting F-stop on Sony A7III is misunderstanding the values.
Each increment in F-stop value either doubles or halves the amount of light entering the lens.
Overusing Wide Or Narrow Apertures
Another mistake photographers make is overusing either wide or narrow apertures.
Using a very wide aperture can lead to a shallow depth of field, while a narrow aperture limits light.
Not Considering Depth Of Field
Failure to consider depth of field is a critical error when adjusting F-stop.
Ensure to adjust F-stop based on the desired depth of field in your shot.
Creative Techniques With F-stop
F-stop is a crucial setting on the Sony A7III that allows you to control the amount of light entering the camera, creating stunning visual effects. In this guide, we’ll explore creative techniques using the F-stop to elevate your photography game.
Creating A Shallow Depth Of Field
By adjusting the F-stop to a lower value (e.g., f/1.8), you can achieve a shallow depth of field. This technique brings your subject into sharp focus while blurring the background, adding a captivating sense of depth and drawing attention to your main subject.
Achieving Bokeh Effect
To achieve an enticing bokeh effect, set the F-stop to a wider aperture (e.g., f/2.8 or lower). This creates beautifully blurred, out-of-focus areas in your image, adding a dreamy and ethereal quality to your photographs, particularly when capturing portraits or close-up shots.
Using F-stop For Low Light Photography
When shooting in low light conditions, adjusting the F-stop to a wider aperture (smaller f-stop number) enables more light to reach the sensor, allowing you to capture clear and vibrant images in challenging lighting environments.
Advanced F-stop Settings
Discover how to effortlessly adjust the f-stop settings on your Sony A7III to achieve advanced control over your camera’s aperture. Learn how to enhance your photography skills with this essential feature, allowing for precise adjustments and creative expression in every shot.
When it comes to photography, understanding and utilizing advanced f-stop settings is key to capturing the perfect shot. The f-stop, or aperture, controls how much light enters the camera lens, influencing the depth of field and overall image exposure. In this article, we will explore two important features for adjusting the f-stop on your Sony A7III: aperture priority mode and manual mode. We will also discuss bracketing for exposure, helping you achieve well-exposed images in challenging lighting conditions.
Using Aperture Priority Mode
In aperture priority mode, you have control over the f-stop setting while the camera handles the rest of the exposure settings. This mode is perfect for situations where you want to control the depth of field and let the camera determine the appropriate shutter speed and ISO. Follow these simple steps to use aperture priority mode on your Sony A7III:
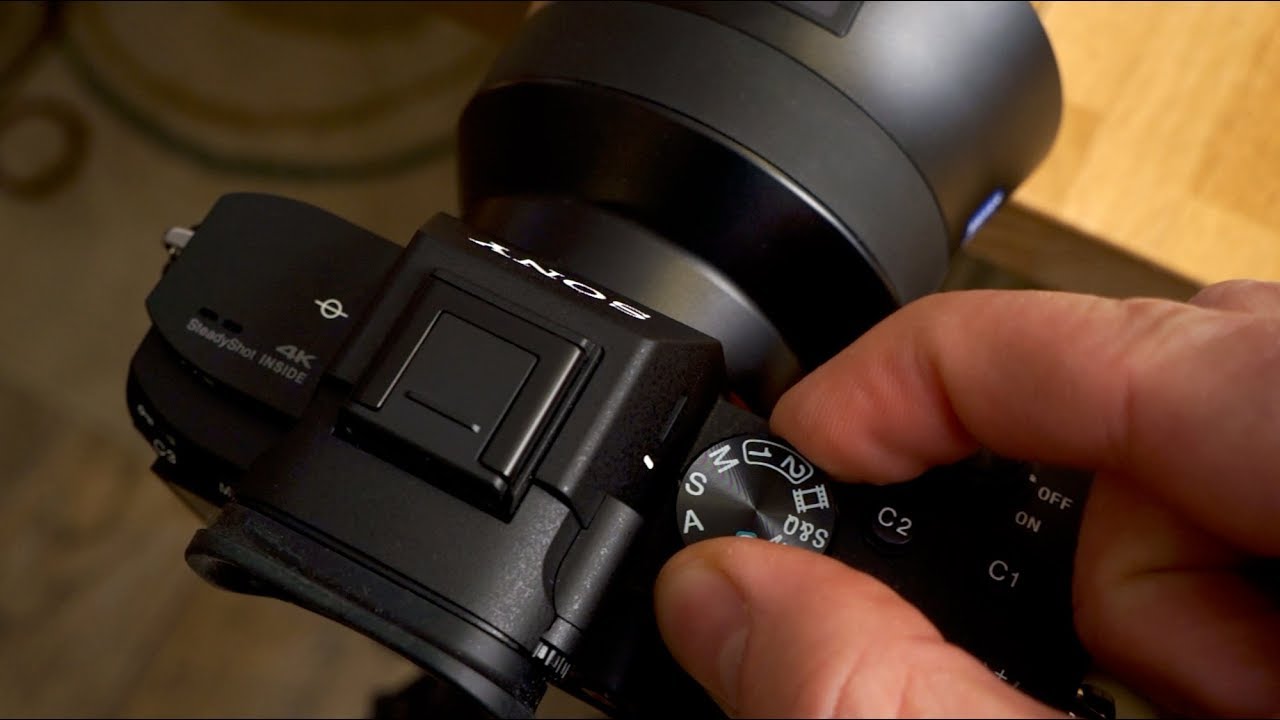
- Turn the camera mode dial to A or Av, which signifies aperture priority mode.
- Use the command dial to adjust the f-stop value. A lower f-stop (e.g., f/1.8) will create a shallower depth of field with a blurred background, while a higher f-stop (e.g., f/11) will result in a greater depth of field with more of the image in focus.
- Compose your shot and half-press the shutter button to allow the camera to meter the scene and determine the appropriate shutter speed and ISO.
- Make any necessary adjustments to exposure compensation using the dedicated controls, if needed.
- Fully press the shutter button to capture the image.
Utilizing Manual Mode
If you prefer full control over both the f-stop and other exposure settings, manual mode is the way to go. Manual mode grants you complete creative freedom by allowing you to fine-tune each aspect of your shot. Follow these steps to utilize manual mode on the Sony A7III:
- Switch the camera mode dial to M, indicating manual mode.
- Use the command dial to adjust the f-stop value according to your desired depth of field.
- Next, adjust the shutter speed to control the amount of time the camera’s sensor is exposed to light. Higher shutter speeds freeze motion, while lower shutter speeds create motion blur.
- Finally, set the ISO sensitivity to achieve the desired level of overall image brightness. Higher ISO values allow for shooting in low light conditions but may introduce more digital noise.
- Compose your shot and adjust the settings as needed.
- Press the shutter button fully to capture the image.
Bracketing For Exposure
In challenging lighting situations, such as high contrast scenes, using bracketing for exposure can help ensure you capture the perfect shot. Bracketing involves taking multiple shots, each with a different exposure value, and then selecting the best one during post-processing. Here’s how you can enable bracketing on your Sony A7III:
| Step | Description |
|---|---|
| 1 | Navigate to the camera settings menu by pressing the menu button. |
| 2 | Select the “Drive Mode” option. |
| 3 | Choose the “Bracketing” option and select the number of shots you want to take. |
| 4 | Adjust the bracketing settings, such as exposure value increments and order. |
| 5 | Compose your shot and press the shutter button to activate the bracketing sequence. |
By enabling bracketing, you increase your chances of capturing a well-exposed image, especially in challenging lighting conditions. Remember to experiment with different settings and techniques to achieve your desired results with the f-stop and exposure settings on your Sony A7III.
Credit: mirrorlesscomparison.com

Credit: www.techgeartalk.com
Frequently Asked Questions On How To Change F Stop On Sony A7iii
How Do I Set The F-stop On My Sony?
To set the F-stop on your Sony camera, adjust the aperture ring or use the camera’s menu system.
How Do I Change The Shutter Speed On My Sony A7 Iii?
To change the shutter speed on your Sony a7 III, turn the top dial to adjust the setting.
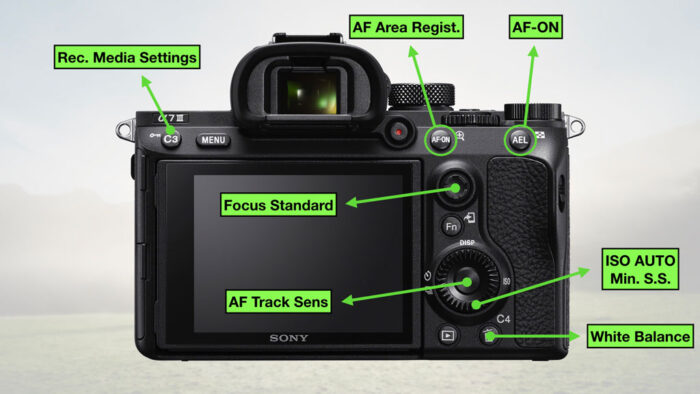
How To Set Minimum Shutter Speed In Aperture Priority Mode Sony A7iii?
To set the minimum shutter speed in aperture priority mode on the Sony a7iii, adjust the “Auto” setting in the camera menu. Select the desired minimum shutter speed to ensure proper exposure.
How Do I Manually Set Iso On Sony A7iii?
To manually set ISO on Sony a7iii, go to the camera’s menu and navigate to the camera settings. Select ISO and adjust the desired ISO value.
Conclusion
Mastering the f-stop on your Sony A7III is essential for capturing stunning photographs. By adjusting the aperture settings, you can control depth of field and achieve creative effects. With practice and experimentation, you can elevate your photography skills and produce captivating images.
Keep learning and honing your craft to unlock the full potential of your camera.