To set working hours in Google Calendar, go to Settings, choose “View Options,” then “Customize Working Hours.” Managing schedules helps optimize productivity and time management.
Planning your day with specific working hours ensures efficient use of time and resources. Using Google Calendar’s features allows for better organization and planning of tasks. By setting up working hours, you can prioritize important activities and create a structured routine for maximum efficiency.
Customize your calendar settings to align with your specific work hours for smoother workflow management. Take advantage of these tools to enhance productivity and stay on track with your daily tasks.
Credit: zapier.com
Syncing Your Calendar
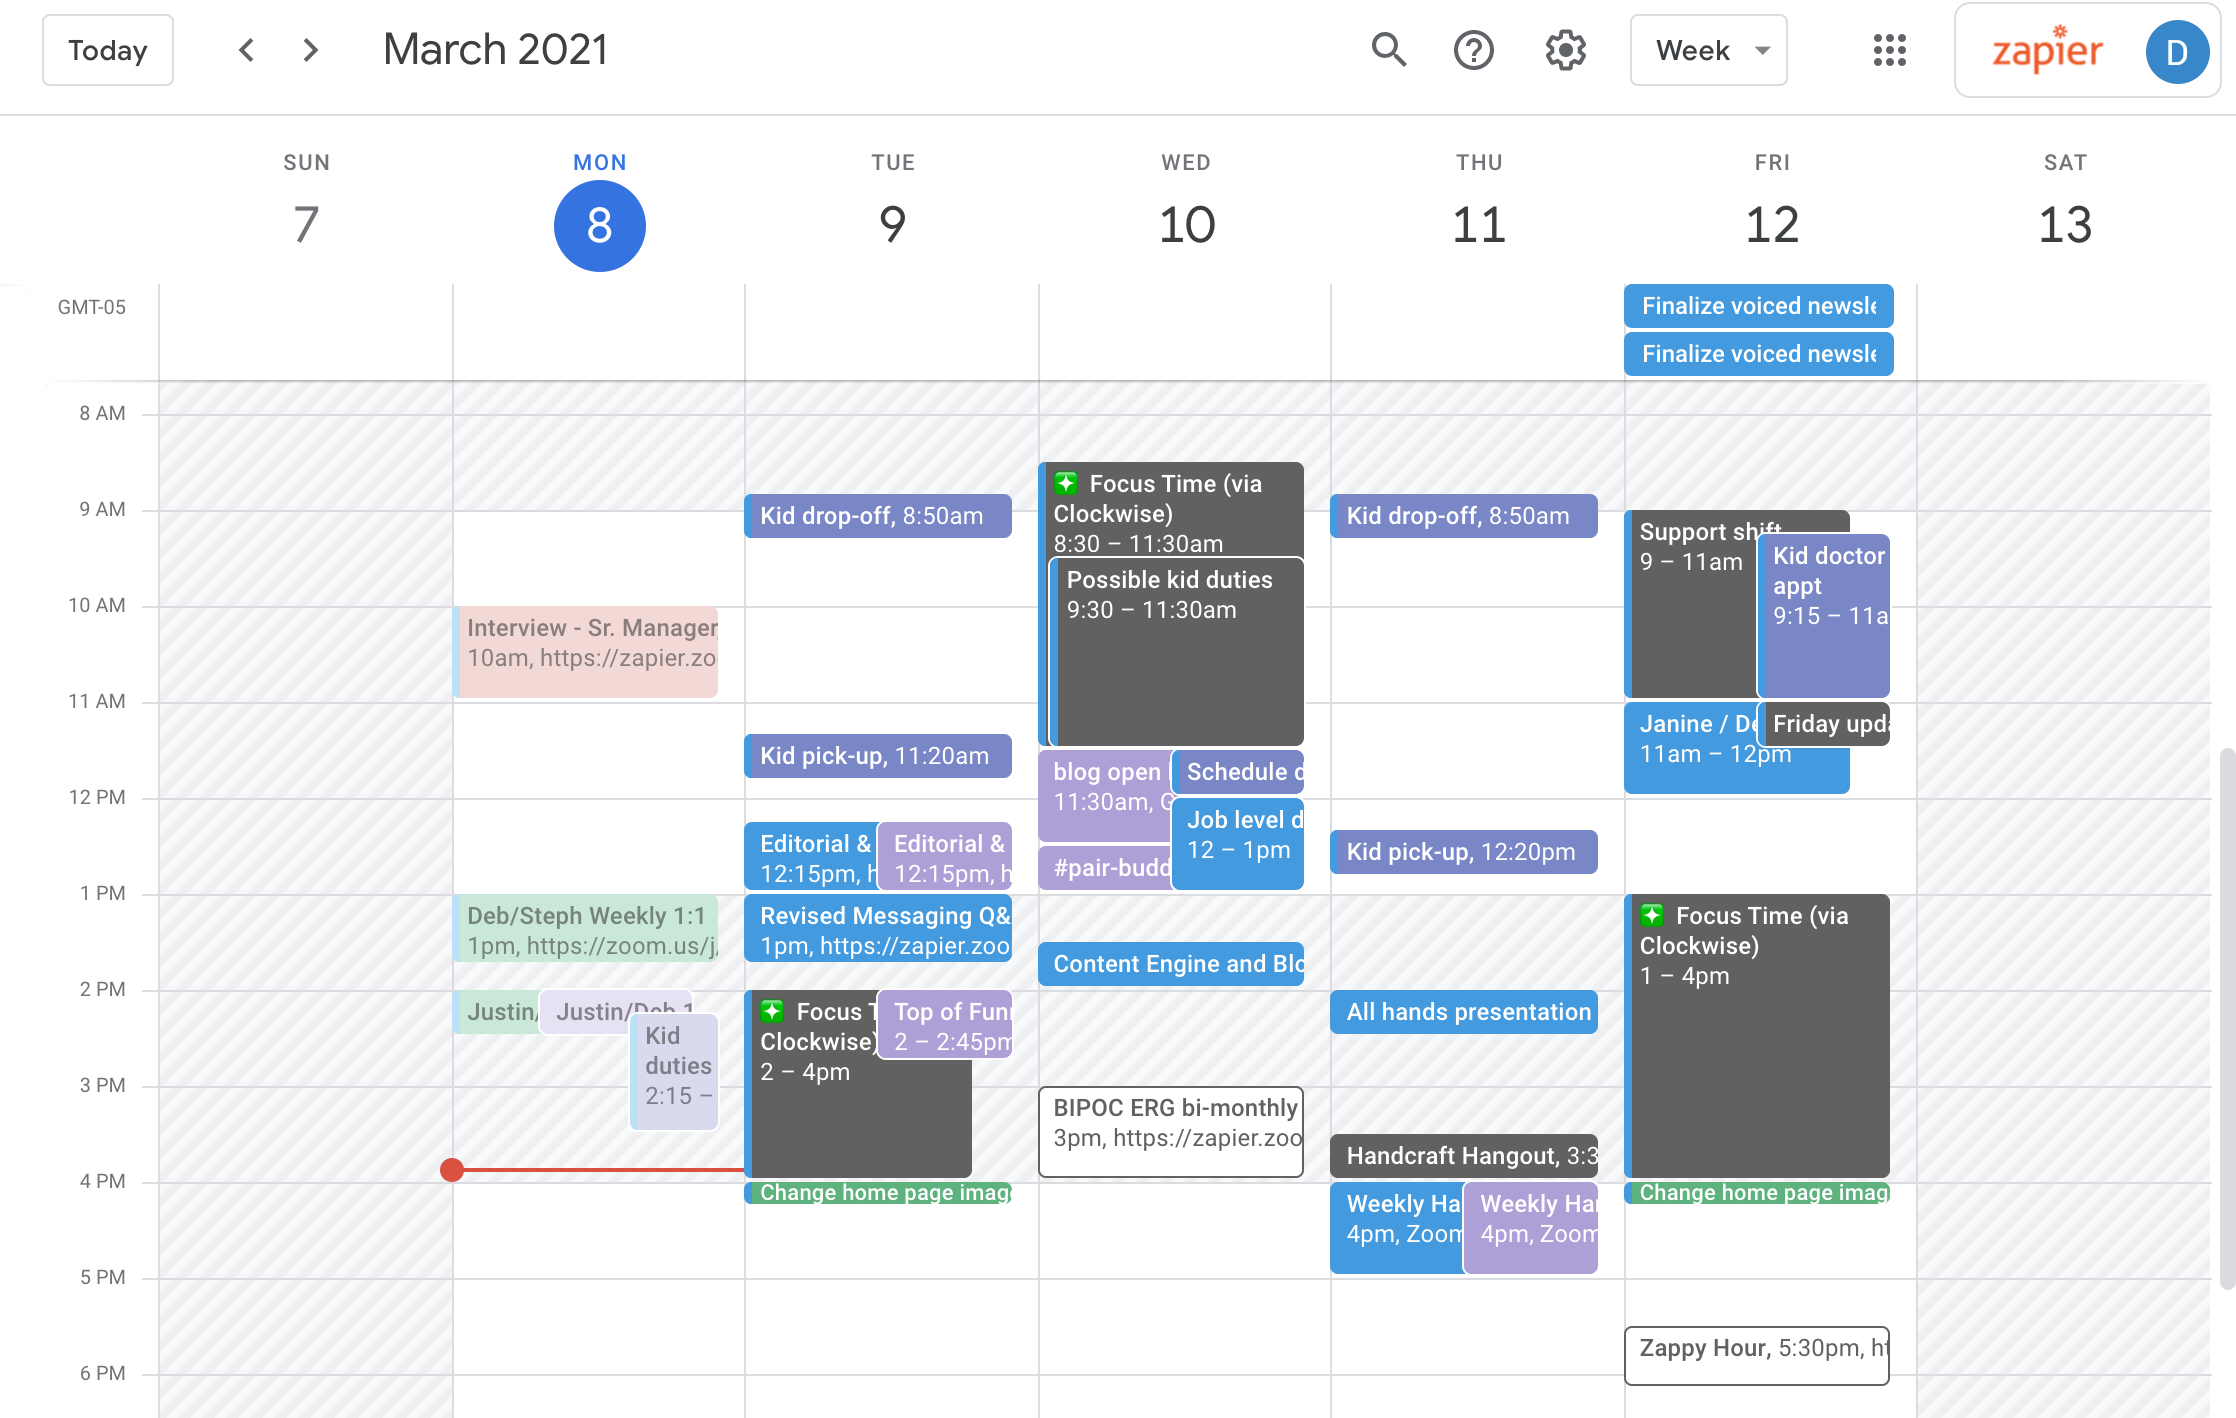
Syncing your Google Calendar with other devices is essential for managing your schedule effectively. Whether you’re juggling work and personal commitments or collaborating with colleagues on projects, syncing your calendar ensures that you stay organized and up-to-date across all your devices. In this guide, we’ll go through the process of syncing your Google Calendar on different devices, starting with choosing the right devices.
Choosing The Right Devices
When it comes to syncing your Google Calendar, it’s important to choose devices that are compatible with the platform. Ensure that the devices you intend to sync with your Google Calendar support the necessary apps or have the capability to link to your calendar through settings or configurations.
Linking Google Calendar
To sync your Google Calendar on multiple devices, you need to link it to each device individually. First, check if the devices you want to sync support Google Calendar. Once verified, follow these simple steps to link your calendar:
- Open the settings or preferences on your respective devices.
- Locate the Accounts or Sync section.
- Select Add Account or Add Sync Account option.
- Choose Google from the list of account types available.
- Enter your Google account credentials if prompted.
- Enable Calendar syncing to ensure that your events and appointments are synchronized across all your devices.
By following these steps, you can seamlessly integrate your Google Calendar with your chosen devices, allowing you to access and manage your schedule from anywhere. Remember to repeat this process for each device you want to sync with your Google Calendar.
Accessing Calendar Settings
In Google Calendar, setting up your working hours is essential for productive time management. To begin, you need to access the Calendar Settings where you can define your availability.
Opening Google Calendar
To open Google Calendar, simply navigate to the Google Calendar website on your browser.
Navigating To Settings
To access the Calendar Settings, look for the gear icon located at the top right corner of the page.
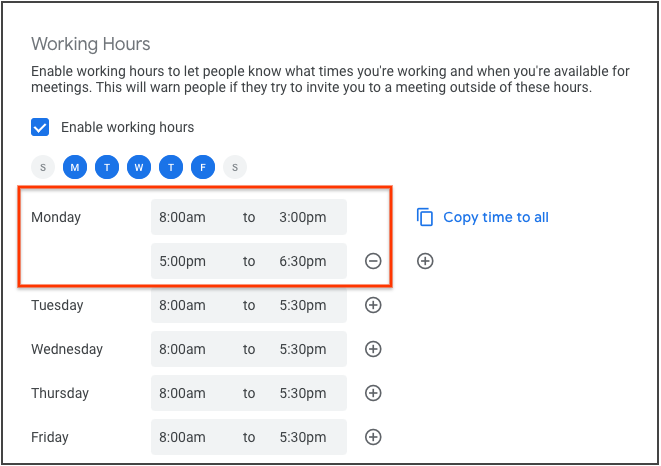
Setting Up Working Hours
Selecting The Desired Days
- Click on the “Settings” gear icon in Google Calendar.
- Select “Settings” from the dropdown menu.
- Click on the “Working Hours” tab on the left sidebar.
- Choose the days you want to set as working days.
Defining Start And End Times
- Under “Working Hours,” click on the “Add working hours” button.
- Set the start and end times for your workday.
- Click “Save” to apply the working hours to your calendar.
- Now, your Google Calendar will reflect your set working hours.
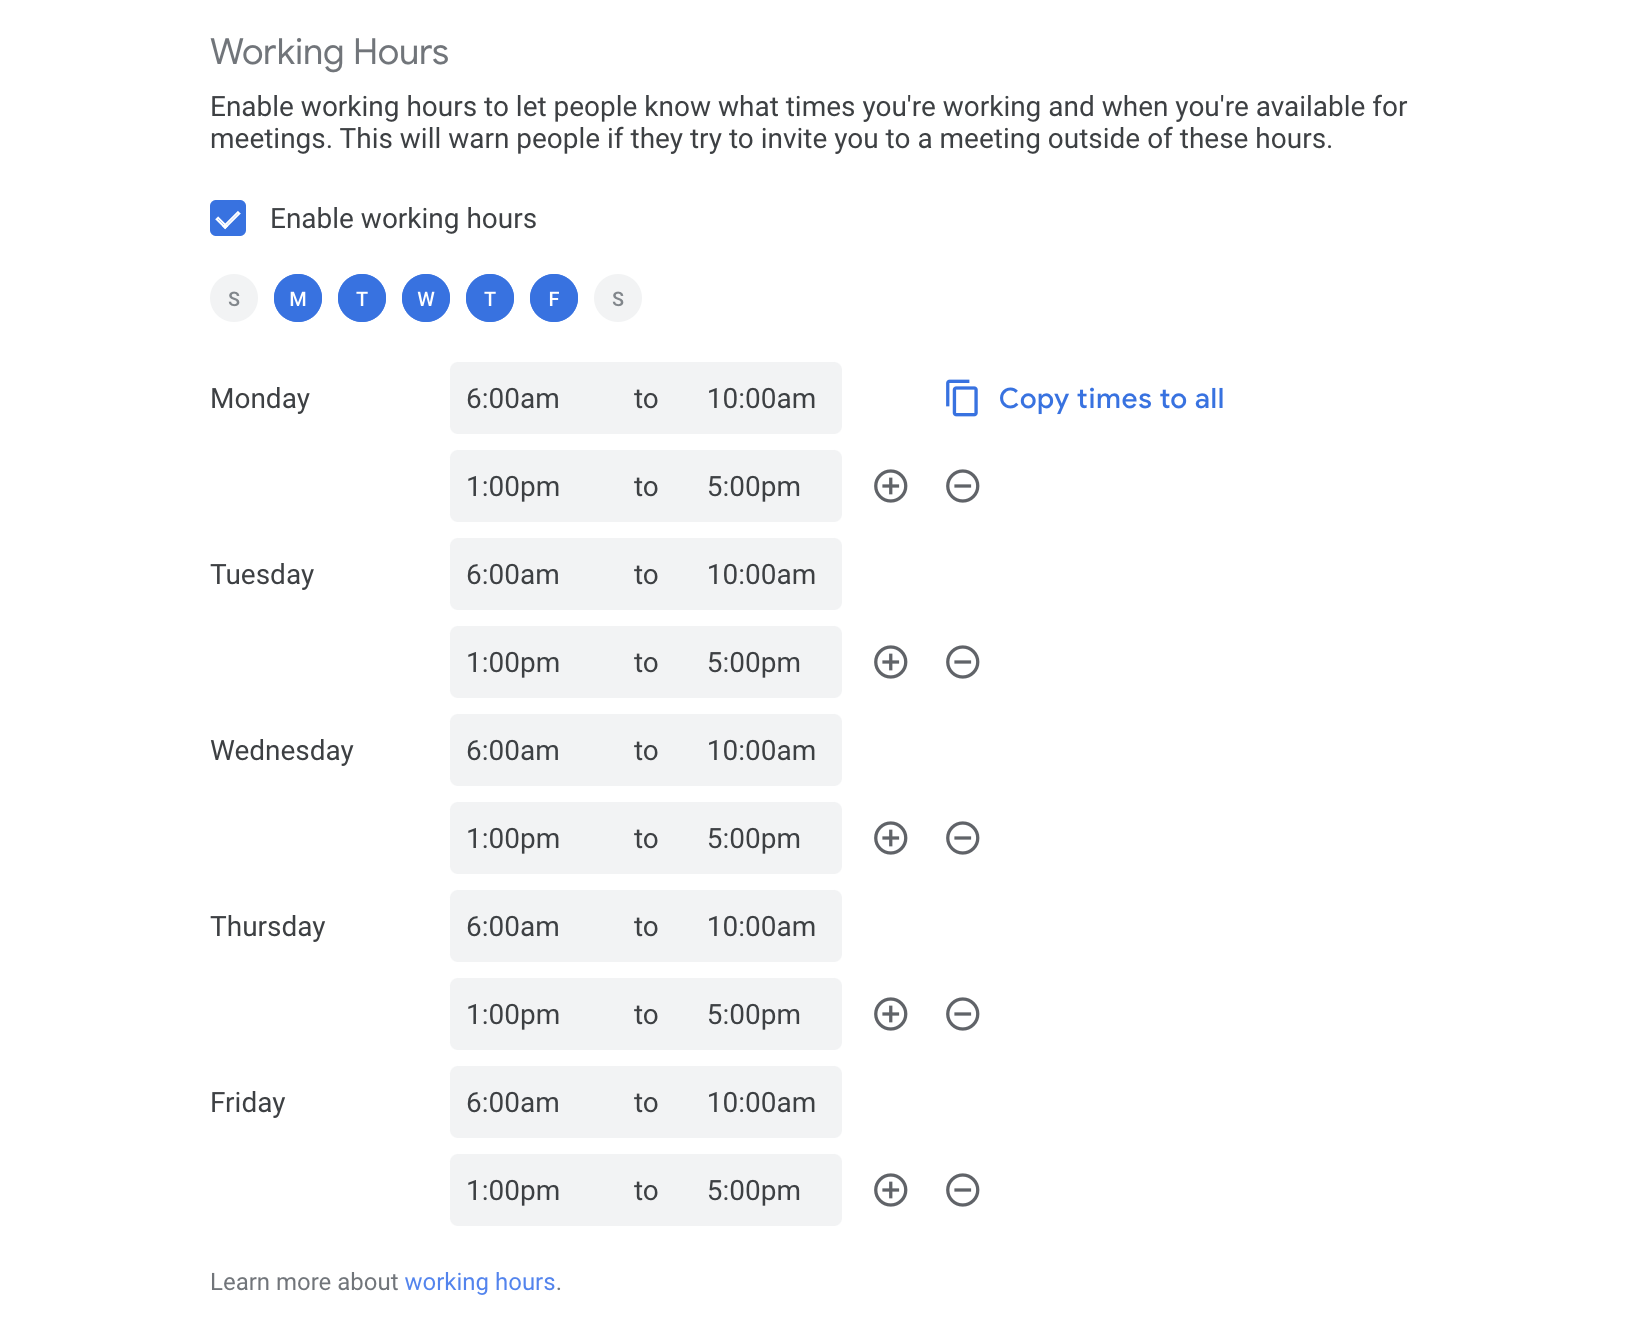
Credit: zapier.com
Adding Exceptions
When it comes to adding exceptions in Google Calendar, you can easily customize your working hours to accommodate special event blocks and break times. By adding exceptions, you can make sure your calendar reflects your true availability and schedule. Let’s take a look at how to include exceptions in your working hours.
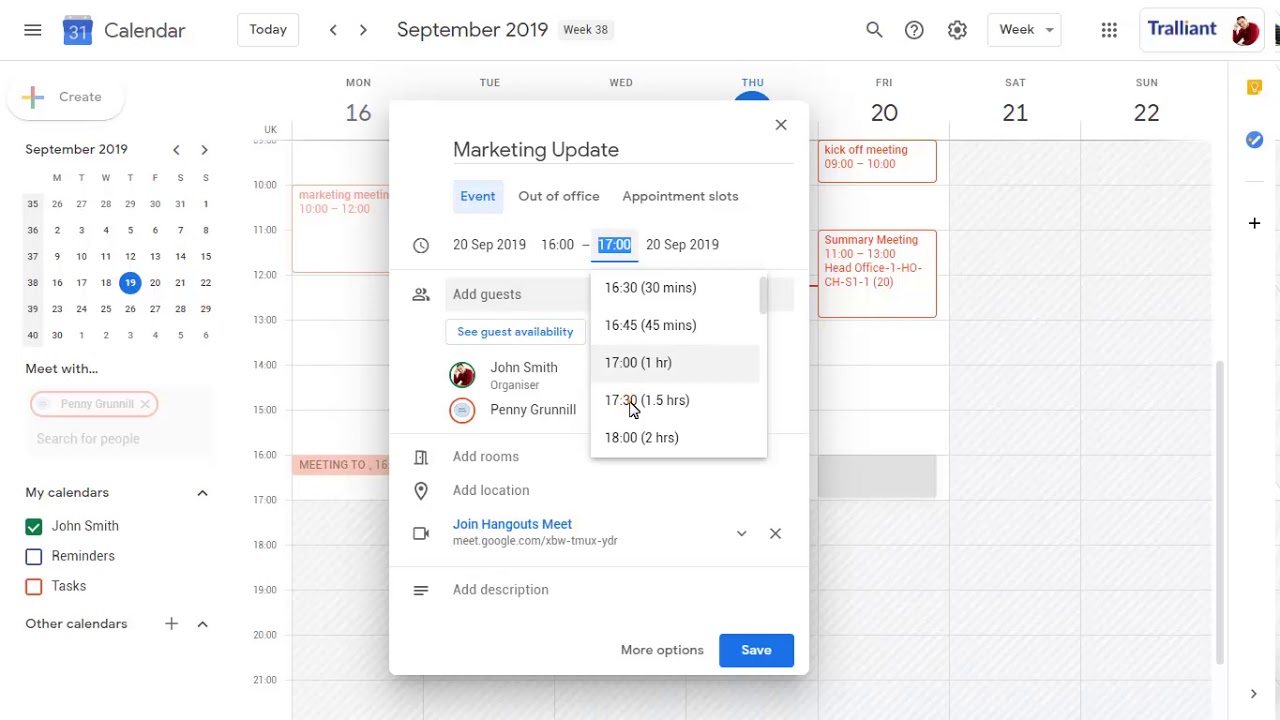
Creating Special Event Blocks
Creating special event blocks in Google Calendar allows you to mark specific times as unavailable for meetings and appointments. Simply add an event for the specific time you want to block off and set it as “busy”. This will ensure that your working hours are accurately reflected in your calendar, and that others will not try to schedule meetings during those times.
Including Breaks Or Lunch
It’s important to include breaks or lunchtime in your working hours to ensure you have time for rest and rejuvenation. You can add breaks or lunchtime by creating an event in your calendar and marking it as “busy” for the duration of your break. This will help you maintain a healthy work-life balance and avoid overbooking yourself during important personal time.
Notifications And Reminders
Learn how to efficiently manage your working hours by setting up notifications and reminders in Google Calendar. Stay organized and never miss an important meeting or task again.
Setting Up Reminders
Setting up reminders in Google Calendar is a simple yet effective way to stay organized and on top of your tasks. By creating reminders, you ensure that important deadlines and appointments are never missed. Plus, with the ability to customize the reminders, you can receive notifications in a manner that suits your workflow. To set up reminders in Google Calendar, follow these easy steps:- In your Google Calendar, locate the desired event or task for which you want to set a reminder.
- Click on the event to open the event details.
- Within the event details, navigate to the “Reminders” section.
- Select the desired reminder option from the available choices, such as “Email,” “Popup,” or “Notification” on your mobile device.
- Adjust the reminder time by specifying how long before the event you want to be notified.
Receiving Notifications
Receiving notifications in Google Calendar is a key aspect of managing your working hours effectively. Notifications act as gentle reminders that alert you about upcoming events or tasks, helping you stay focused and organized. With Google Calendar, you can receive notifications via various means, including email, push notifications on mobile devices, or pop-up reminders on your desktop. To receive notifications in Google Calendar, here’s what you need to do:- Open your Google Calendar settings by clicking on the gear icon in the top right corner.
- Select “Settings” from the dropdown menu.
- Within the settings menu, locate the “Notifications” tab.
- Customize the notification preferences for the different types of events, such as “New events,” “Changed events,” or “Canceled events.”
- Choose your preferred notification method, whether it be email, mobile, or desktop notifications.
Credit: m.youtube.com
Frequently Asked Questions On How To Set Working Hours In Google Calendar
How Do I Set Busy Hours In Google Calendar?
To set busy hours in Google Calendar, simply open the app and click on the “Settings” tab. Then, select the “Busy Hours” option and choose the time slots when you’re unavailable. Finally, save your changes to update your busy hours.
How Do I Set My Availability In Google Calendar?
To set availability in Google Calendar, click on a time slot, select “Available” or “Busy” status. Time is now blocked or free.
How Do You Add Work Hours?
To add work hours, access your time tracking system and input the hours worked each day. Submit the total hours at the end of the pay period for payment processing.
How Do I Book Office Hours On Google Calendar?
To book office hours on Google Calendar, simply create an event and set the time slots for office hours. Share the calendar link so others can book a slot.
Conclusion
Incorporating your working hours into Google Calendar can significantly improve your productivity and work-life balance. With the efficient and user-friendly features of Google Calendar, managing your schedule becomes streamlined and hassle-free. By following the steps outlined in this guide, you can take control of your time and maximize your productivity.
Start implementing these tips today and feel the positive impact on your daily routine.