To add a border in Photoshop, select the desired layer and go to “Layer” > “Layer Style” > “Stroke.”
Choosing The Right Image
When it comes to adding borders in Photoshop, the first crucial step is choosing the right image. Creating a visually appealing border largely depends on the image you select as the base. Here’s how to ensure you pick the perfect image for your border.
Selecting High-quality Images
High-quality images are key for border applications in Photoshop. Ensure your image is clear and sharp to prevent pixelation in the border creation process.
Considering Image Composition
The composition of the image matters for an effective border. Check if the subject of the image is well-centered or aligned to make the border placement visually appealing.
Understanding Border Options
Understanding Border Options: Adding a border to your image in Photoshop can enhance its visual appeal and draw attention to the main subject. By understanding the different border options available in Photoshop, you can customize the look and feel of your images to suit your style.
Exploring Border Styles
Photoshop offers a variety of border styles to choose from, including dotted, dashed, solid, or custom patterns. Each style can be adjusted to create a unique border effect that complements your image.
Adjusting Border Width And Color
With Photoshop, you can easily adjust the width and color of your border to achieve the desired effect. Changing the width can make the border more prominent or subtle, while selecting the right color can help it blend seamlessly with your image.
Adding Borders In Photoshop
In Photoshop, adding borders to your images can help enhance their appearance and make them stand out. Whether you’re creating graphics for social media or designing a website, knowing how to add borders in Photoshop can be a valuable skill. There are various techniques you can use to achieve this effect, from using the Stroke effect to creating borders with the Rectangular Marquee Tool.
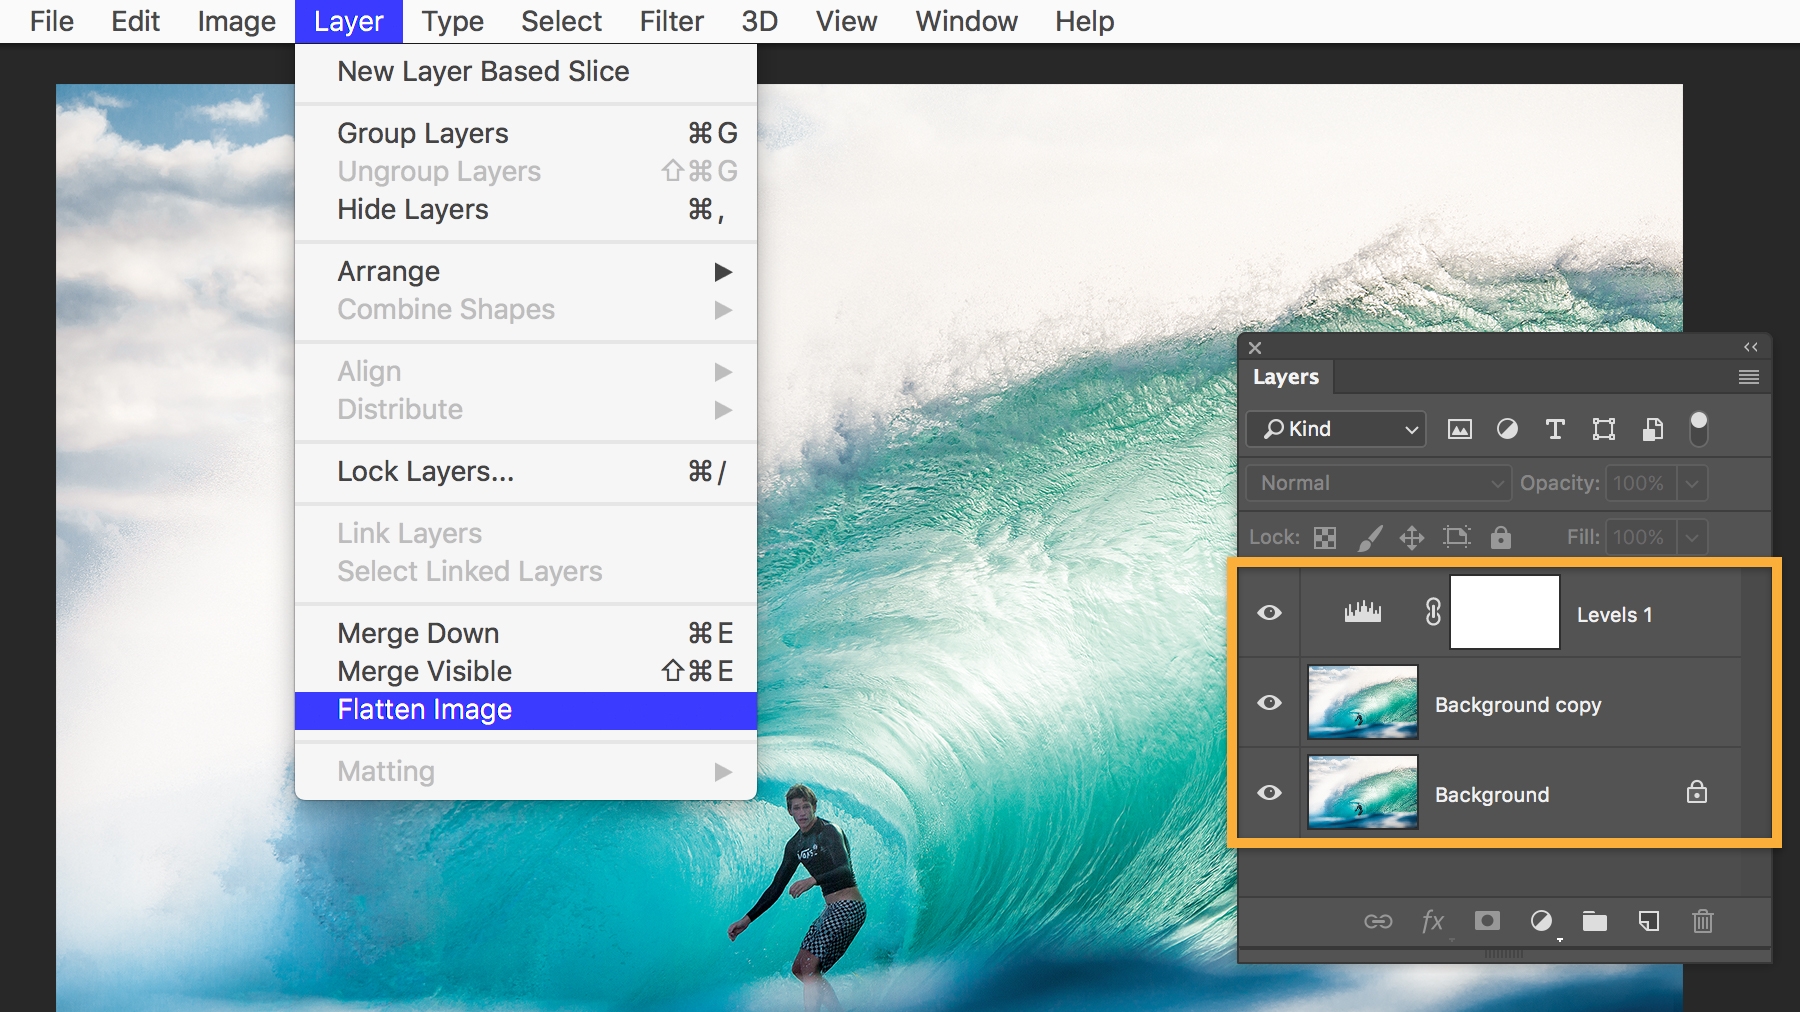
Using The Stroke Effect
To add a border to an image using the Stroke effect in Photoshop, follow these steps:
- Select the layer to which you want to add a border.
- Go to the “Layer” menu, select “Layer Style,” and then choose “Stroke.”
- Adjust the settings for the stroke, including the size, position, color, and opacity.
- Click “OK” to apply the stroke effect to your image.
Creating Borders With The Rectangular Marquee Tool
If you prefer a more manual approach, you can create borders using the Rectangular Marquee Tool:
- Open your image in Photoshop and select the Rectangular Marquee Tool from the toolbar.
- Draw a rectangle around the area where you want the border to appear.
- Go to the “Edit” menu, choose “Stroke,” and set the desired width and color for the border.
- Deselect the marquee selection to reveal the border around your image.

Credit: www.photoshopsupply.com
Customizing Border Effects
Adding a border to your images in Photoshop is a great way to enhance their appearance and make them stand out. But did you know that you can customize your border effects to achieve even more stunning results? In this post, we will explore how to experiment with gradient borders and add texture to borders in Photoshop, giving your images a unique and eye-catching touch.
Experimenting With Gradient Borders
If you want to add a touch of elegance and sophistication to your images, gradient borders are an excellent choice. With Photoshop, you can create gradient borders using a variety of colors and styles. Here’s how:
- Open your image in Photoshop.
- Select the Rectangular Marquee Tool from the toolbar.
- Draw a rectangle around your image, leaving some space for the border.
- Go to the Edit menu, choose Stroke, and a dialog box will appear.
- In the dialog box, select the desired width for your border and choose the Gradient option.
- Click on the gradient preview to open the Gradient Editor.
- Experiment with different colors and styles in the Gradient Editor to create the perfect gradient effect for your border.
- Once you’re satisfied with your gradient settings, click OK to apply the effect.
- Press Ctrl+D (Windows) or Cmd+D (Mac) to deselect the border.
Adding Texture To Borders
If you want to add a more artistic and tactile feel to your borders, adding texture can be a game-changer. By applying different patterns and textures, you can give your images a unique and personalized look. Here’s how:
- Open your image in Photoshop.
- Select the Rectangular Marquee Tool from the toolbar.
- Draw a rectangle around your image, leaving some space for the border.
- Go to the Edit menu, choose Stroke, and a dialog box will appear.
- In the dialog box, select the desired width for your border and choose the Texture option.
- Click on the textured pattern preview to open the Texture Picker.
- Browse through the available textures or click Load Texture to use your own custom texture.
- Choose the texture that best complements your image and adjust the scale and depth settings as needed.
- Click OK to apply the textured border effect.
- Press Ctrl+D (Windows) or Cmd+D (Mac) to deselect the border.
By customizing your border effects in Photoshop, you can elevate the visual impact of your images and make them truly remarkable. Whether you opt for gradient borders or textured borders, these techniques are sure to give your images a professional and polished look.
Saving And Exporting Images
Once you have added a border to your image in Photoshop, the next step is to save and export it in the appropriate format. Saving and exporting images properly can ensure that the borders you added remain intact and of high quality across different platforms and devices. In this section, we will cover how to optimize images for different platforms and preserve the quality of the borders.
Optimizing Images For Different Platforms
When it comes to uploading images online, it’s essential to optimize them to ensure they load quickly and display correctly on various devices and platforms. Different platforms have different size limits and requirements for images. To optimize your border image in Photoshop:
- Choose the appropriate file format: Depending on the type of image, you can save it as a JPEG, PNG, or GIF file. JPEG is suitable for photographs and complex images, while PNG is ideal for graphics with transparency and sharp edges.
- Adjust image size and resolution: Resize the image to fit the platform’s requirements. Make sure to maintain the aspect ratio to prevent distortion. Additionally, adjust the image resolution to strike a balance between quality and file size.
- Compress the image: Reduce the file size of your image without compromising too much on quality. Photoshop offers various compression options, allowing you to find the right balance between size and image clarity.
Preserving Border Quality
When saving and exporting your image with a border, it’s important to ensure that the quality of the border is preserved. Here are a few tips to maintain the integrity of the border:
- Save the border image with transparency: If you want to use the image on top of other backgrounds, such as in a website design, save it with a transparent background. This will enable the border to seamlessly blend with the underlying elements.
- Avoid excessive compression: While it’s crucial to optimize the image size, be cautious not to over-compress the border details. High compression can result in fuzziness or pixelation around the edges of the border. Find the right balance between file size and image quality.
- Consider using a lossless file format: If the border contains intricate details or sharp lines, saving the image in a lossless file format like PNG or GIF can help retain the crispness and clarity. These formats do not compress the image as aggressively as JPEG, preserving the border’s quality.
By following these steps, you can save and export your images with borders in Photoshop while ensuring their compatibility with different platforms and maintaining the quality of the borders. Remember to always preview your image on multiple devices to verify that the border appears as desired.
Credit: m.youtube.com

Credit: helpx.adobe.com
Frequently Asked Questions Of How To Add Border In Photoshop
How Do I Add A Border To A Layer In Photoshop?
To add a border to a layer in Photoshop, select the layer, go to Edit, then Stroke. Choose the color, size, and position of the border, and click OK.
How Do I Put A Border Around A Picture?
To put a border around a picture, use photo editing software. Select the image, go to the border option, choose the color and thickness, and apply it. Save the edited picture with the border.
How Do You Add An Outline In Photoshop?
To add an outline in Photoshop, select the object, go to the “Edit” menu, choose “Stroke,” set the desired options, and click “OK”.
How Do I Create A Frame In Photoshop?
To create a frame in Photoshop, use the shape tool to draw a rectangle or square. Adjust the size, color, and thickness to your liking. Add any additional effects or decorations. Finally, position the frame around your image.
Conclusion
Adding borders in Photoshop is a simple yet effective way to enhance your images. By following the step-by-step guide provided in this blog, you can elevate the visual appeal of your photos and make them stand out on various platforms.
Experiment with different border styles and sizes to find the perfect look for your images. With just a few clicks, you can transform your photos and make them more engaging for your audience. Embrace the creative possibilities that borders offer and elevate your visual content with this easy-to-use Photoshop feature.