
Google Sheets Date Picker feature allows users to easily input dates in a user-friendly calendar interface. Users can select dates conveniently without the need to manually enter them.
This feature enhances the user experience by simplifying date entry tasks in Google Sheets. Date Picker in Google Sheets provides a seamless way for users to input dates accurately and efficiently. It streamlines the process and reduces errors typically associated with manual date entry methods.
By utilizing the Date Picker feature, users can save time and improve productivity when working with date-related data in Google Sheets.
How To Enable Date Picker In Google Sheets
In this section, we will guide you through the process of enabling the Date Picker in Google Sheets, step by step. The Date Picker add-on in Google Sheets allows you to easily insert and manage dates in your spreadsheets, improving organization and efficiency.
Step 1: Open Your Google Sheets
To begin, open your Google Sheets by navigating to sheets.google.com and signing in to your Google account.
Step 2: Go To The Add-ons Menu
Once your spreadsheet is open, locate the “Add-ons” menu in the top navigation bar.
Step 3: Search For And Install The Date Picker Add-on
- Click on “Add-ons” and then select “Get add-ons” from the dropdown menu.
- In the add-ons store, search for “Date Picker” in the search bar.
- Once you find the Date Picker add-on, click on it and select “Install”.
Step 4: Enable The Date Picker
After installing the Date Picker add-on, it will be added to your Google Sheets. To enable it, go back to the “Add-ons” menu, hover over the Date Picker option, and choose “Start” to initialize the Date Picker sidebar.
Step 5: Use The Date Picker In Your Spreadsheet
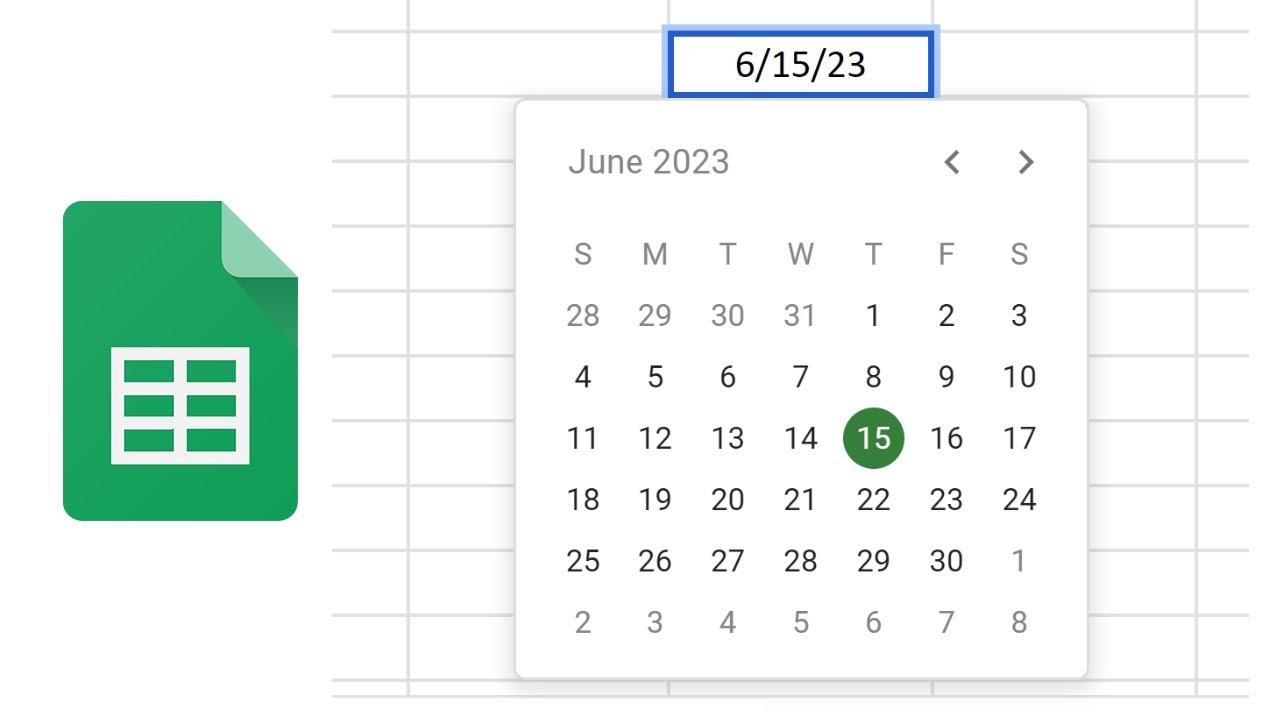
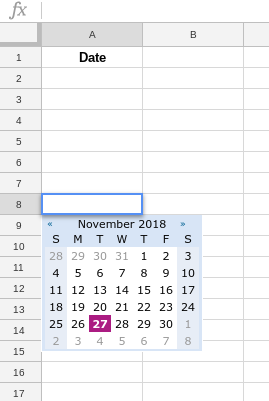
With the Date Picker enabled, you can now easily insert and manage dates in your spreadsheet. Simply click on a cell where you want to insert a date, open the Date Picker sidebar, and choose the desired date. You can also customize the format and behavior of the Date Picker according to your preferences.
Credit: usingtechnologybetter.com
Customizing The Date Picker
Discover how to customize the Google Sheets Date Picker to tailor your date selection process to your specific needs. This feature allows you to create a personalized date picking experience that aligns with your individual requirements, enhancing your efficiency and accuracy in managing dates within your spreadsheets.
Changing The Date Format
To change the date format in Google Sheets Date Picker, follow these simple steps:
- Select the cell where the date picker is located.
- Click on the Data menu at the top.
- Choose “Format” and then “Number”.
- From the dropdown menu, select the desired date format.
Changing The Date Range
You can adjust the date range in the Google Sheets Date Picker as needed:
- Click on the cell with the date picker.
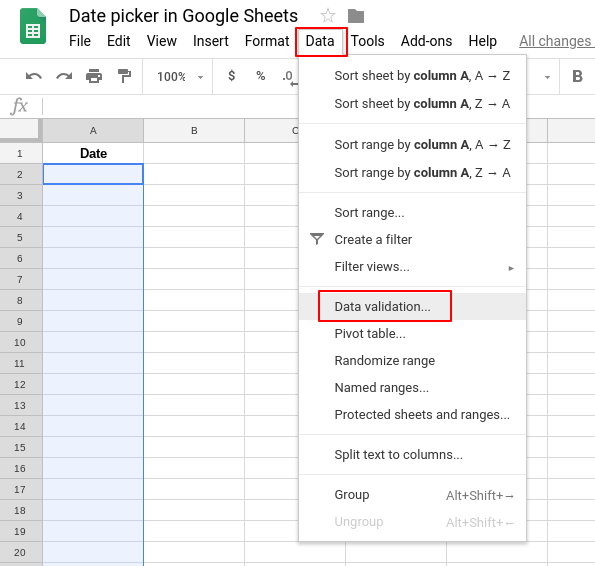
- Go to Data and then Data validation.
- Under Criteria, select “Date”.
- Set the desired start and end dates for the range.
Customizing The Look And Feel
Enhance the appearance of the Date Picker in Google Sheets with these customization tips:
| Customization | Steps |
|---|---|
| Changing colors | Click on the cell, select Format, and then Change color |
| Adjusting font size | Go to Format, Text style, and modify the font size |
| Adding borders | Under Format, choose Borders and select desired border options |
These customization options allow you to tailor the Google Sheets Date Picker to suit your preferences and needs.
Benefits Of Using The Date Picker In Google Sheets
Google Sheets’ Date Picker feature offers several advantages that streamline data input, enhance accuracy, and improve user experience.
Saves Time And Effort
The Date Picker in Google Sheets simplifies the process of entering dates, saving users time and reducing errors.
Ensures Data Accuracy
By using the Date Picker, users can avoid typographical errors and ensure precise date entries in their spreadsheets.
Enhances User Experience
Offering a user-friendly interface, the Date Picker in Google Sheets enhances user experience by making data input smoother and more efficient.
Credit: m.youtube.com
Credit: usingtechnologybetter.com
Frequently Asked Questions On Google Sheets Date Picker
How Do I Add A Date Picker To A Google Sheet?
To add a date picker to a Google Sheet, you can use the built-in date picker feature. Simply go to the cell where you want the date picker, click on the down arrow, and select “Date Picker. ” This will allow you to easily select a date from a calendar view.
How Do I Add A Pop Up Calendar In Google Sheets?
To add a pop-up calendar in Google Sheets, follow these steps: 1. Open your Google Sheets document. 2. Click on the cell where you want the calendar to appear. 3. Go to “Insert” in the menu. 4. Select “Date Picker” from the dropdown.
5. A pop-up calendar will now appear in the selected cell.
How Do I Pull Down Dates In Google Sheets?
To pull down dates in Google Sheets, select the cell and drag the fill handle to generate a series of dates.
How Do I Auto Generate Dates In Google Sheets?
To auto generate dates in Google Sheets, simply enter the starting date in a cell, then drag the fill handle to automatically fill in subsequent dates.
Conclusion
Incorporating a date picker in Google Sheets streamlines data entry and enhances productivity. This versatile feature offers ease of use and a more efficient workflow for businesses and individuals alike. By empowering users to effortlessly input and manipulate date information, the date picker in Google Sheets proves to be an invaluable tool for managing data efficiently.